Captions
PORN
FAP Captions
Cum Sluts
Movie Nudes
Share
Open Chat
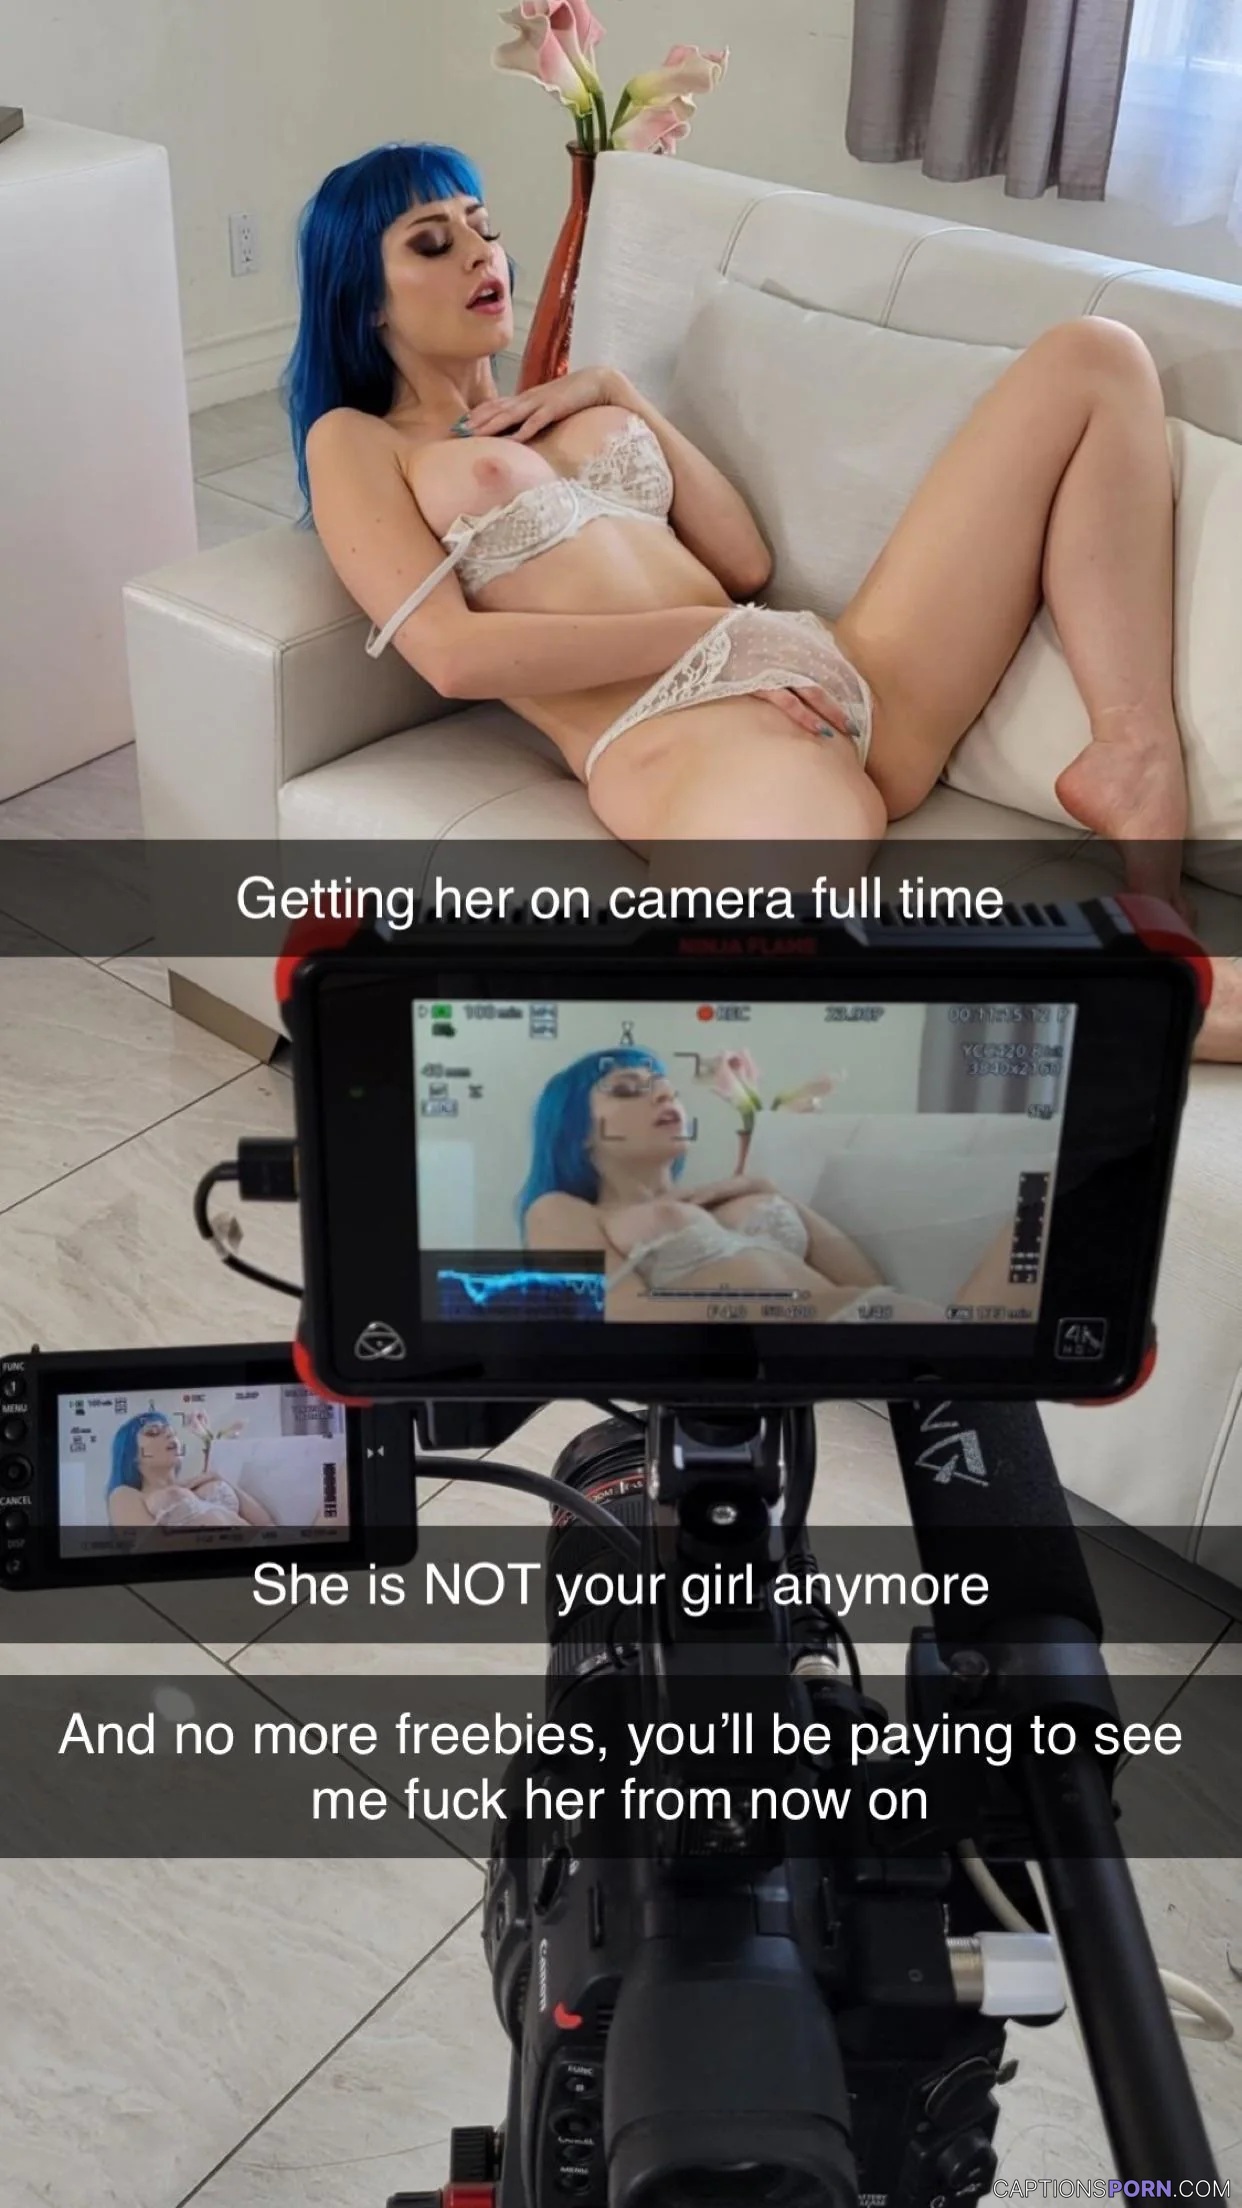
Wild encounter (Final Part)
Cheating wife/ girlfriend
Cheating Captions
Next post
Video Captions
Cum is everything
Your opinions are not needed. Your brain is not needed. Only your holes and tits are needed
Every naughty dreamer craves that helpless feel
Dirty Confessions: Her Wild Tales with Exes Unleashed
Little sis needs big Bros cock to fall asleep
Amazing firsts ❤️😘🥰
Weak Man's Pathetic Spunk Dribble - You're a Cum-Drenched Loser
😫❤️
Why keep the fun to yourself when sharing is caring? 😈🔥
Bimbo Babes Wild Night Out
Show more
Keep Exploring
"Girl's Night" Out - Part 1
Cheating Captions
27Yo (M) Cheating On gf getting head from Fresh 18yo
Cheating Captions
Cheating Snaps
MaleCheating
After Hours Betrayal: Sneaky Slut Gets Creampied
Cheating Captions
Oh face
Cheating Captions
Wait... Is She Really Cheating or Just Teasing? 😏
Cheating Captions
It all makes sense now…doesn’t it! Now you understand!😳
Cheating Captions
What's her name ?
Cheating Captions
Texted my girl and she said she's busy
Cheating Captions
Naughty Cheerleader Gets Dominated by BBC
Cheating Captions
NSFW Captions
My boyfriend's dad fucked me while he was at soccer practice
Cheating Captions
Sneaky Creampie Surprise: Her Walk of Shame with My Load Dripping
Cheating Captions
She Forgot Your Name
Cheating Captions
She couldn’t help herself 🤷
Cheating Captions
Your Girlfriend's Secret Sauce: Always Ready for More
Cheating Captions
Turning to women was her only choice when you keep failing to satisfy her
Cheating Captions
She entertains all the men very well.
Cheating Captions
Beer Pong Gone Wild: Loser Gets Dominated
Cheating Captions
Cuckold Captions
Taboo Captions
This Is I send her husband while he’s at work and Im using his wife’s throat
Cheating Captions
Dumb and Desperate for More 🍆💦
Cheating Captions
Streaks lead to cheating
Cheating Captions
Sneaky Sessions: Bestie's Girl Gets Wrecked (Part 2)
Cheating Captions
You May Also Like
Amellieh's Dripping Wet Pussy - Soaked & Ready for You
pussynudes.com
Fastest swallow on the west 😜
cumshotsluts.com
Fuck My Tight Asshole Hard - Insane Anal Pleasure with Cloudy-Rose
analcave.com
Modern family
cumshotsluts.com
Elia Galera (The Ugliest Woman in the World - 1999)
filmnudes.com
My Fuckdoll Resume: A Cute Amateur Solo
fapwiz.com
Lila Love - I Don't Even Let My Boyfriend Cum In Me
porn15s.com
Betzz and Ambar Lapiedra in Midnight Mystique by Andrej Lupin for Sexart
vanillababes.com
Titty Drop: First Date Cum on My Boobs or Creampie
mostlyboobs.com
Spank Me, Ground Me, or Something More Fun - OnlyFans, Solo, Teen
fapwiz.com
Busty Blonde Babe in Lace Lingerie
mostlyboobs.com
Fake Boobs, Big Tits, and Nipples: A Pleasant Experience
mostlyboobs.com
Dripping Wet Anal Fuck: Peachnecctar's Tight Ass Gets Destroyed
analcave.com
Fuck Yeah, It Fits Perfectly - Hot Anal Action with Christian Clay & Rebel Lynn
analcave.com
Random Porn Caption